

Jump to:
Creating a New Guideline | Edit Guideline
Creating a New Guideline
1.
Click on NESA Registration Requirements area you are wanting to create the new Guideline in. This will take you to your school's area for this requirement.
2.
When in the correct area, click on the three dots next to Create. This allows you to create a page from a template. Each School have a pre-setup template with their logo embedded.
![]()
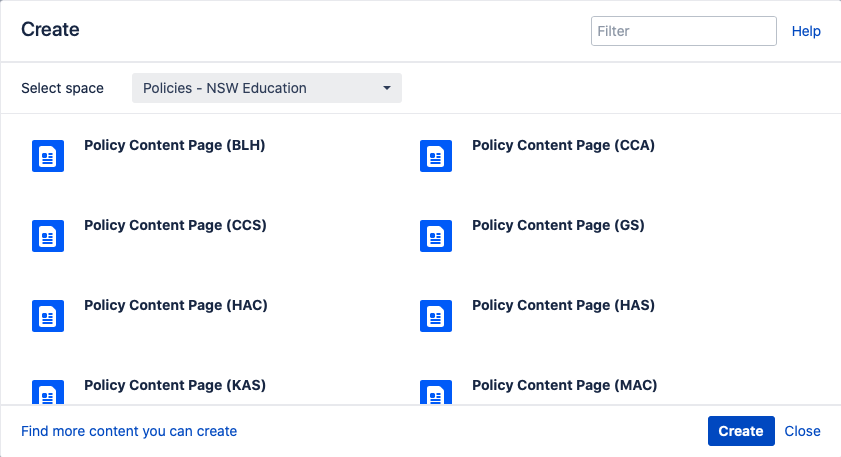
3.
Look for your School's Policy Content Page i.e. "Policy Content Page (BCC)" (This uses the ASA abbreviations). Click on your School and choose "Create"
4.
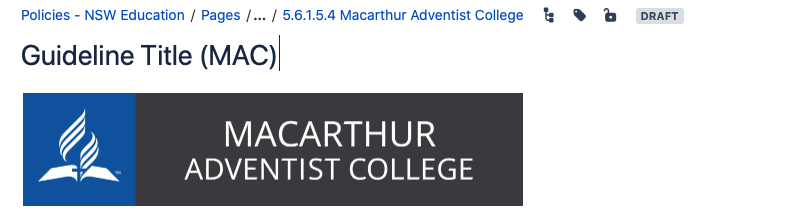
Provide a Page title that describes the guideline being created, making sure it ends with your school abbreviation in brackets i.e Guideline Title (CCS)
5.
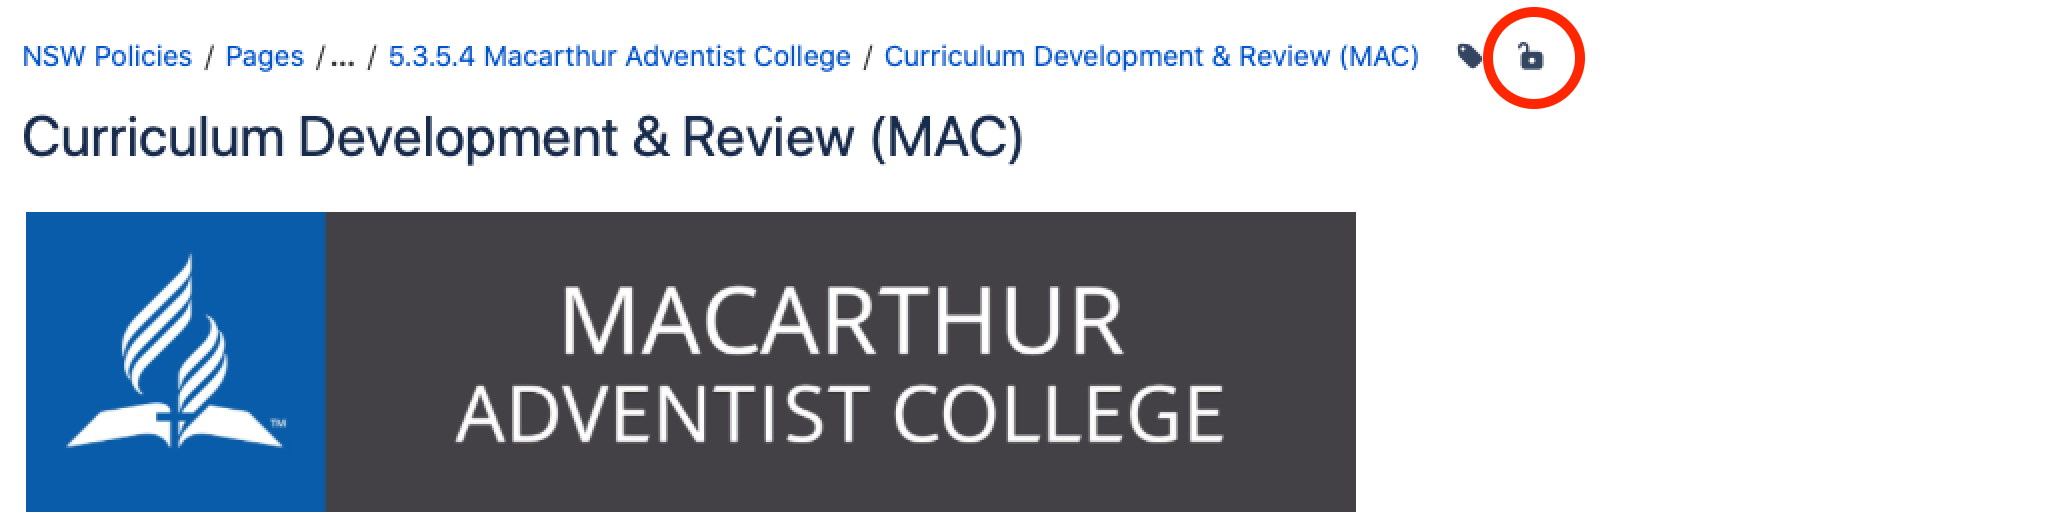
Click on the padlock to edit the restrictions to the page
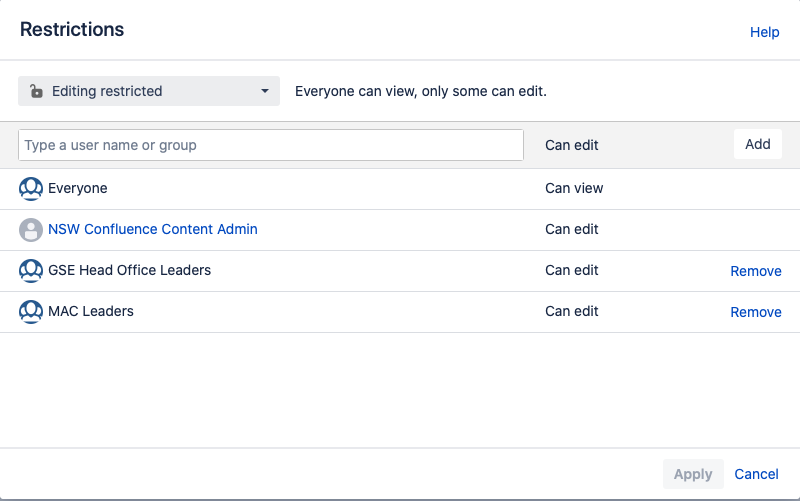
Set restriction to Editing restricted (top left) and add the you Conference Head Office Leaders, and your school leaders to the list. This allows the people of these group to update and edit the guideline.
6.
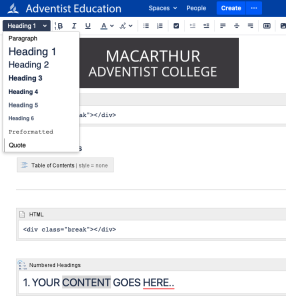
Insert your content in the space marked "1. YOUR CONTENT GOES HERE.."
Don't remove any of the other areas on pages this can alter the way the page looks.
The numbers will automatically happen in the "1. YOUR CONTENT GOES HERE.." area
If you have a pre-existing document or using another school's guideline as a template, copy the contents of the document and paste it in the space marked "1. YOUR CONTENT GOES HERE.."

Make sure that any headings have copied over if not use the formatting section in the top left. This will let the table of contents show the correct heading for quick access.
7.
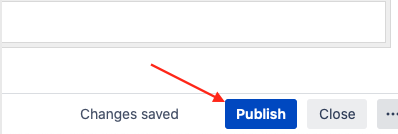
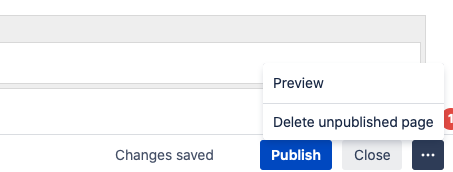
Save the page with the "Publish" button on the bottom of the page.
If you want to discard the page click the 3 dot and then Delete unpublished page
Edit a Guideline
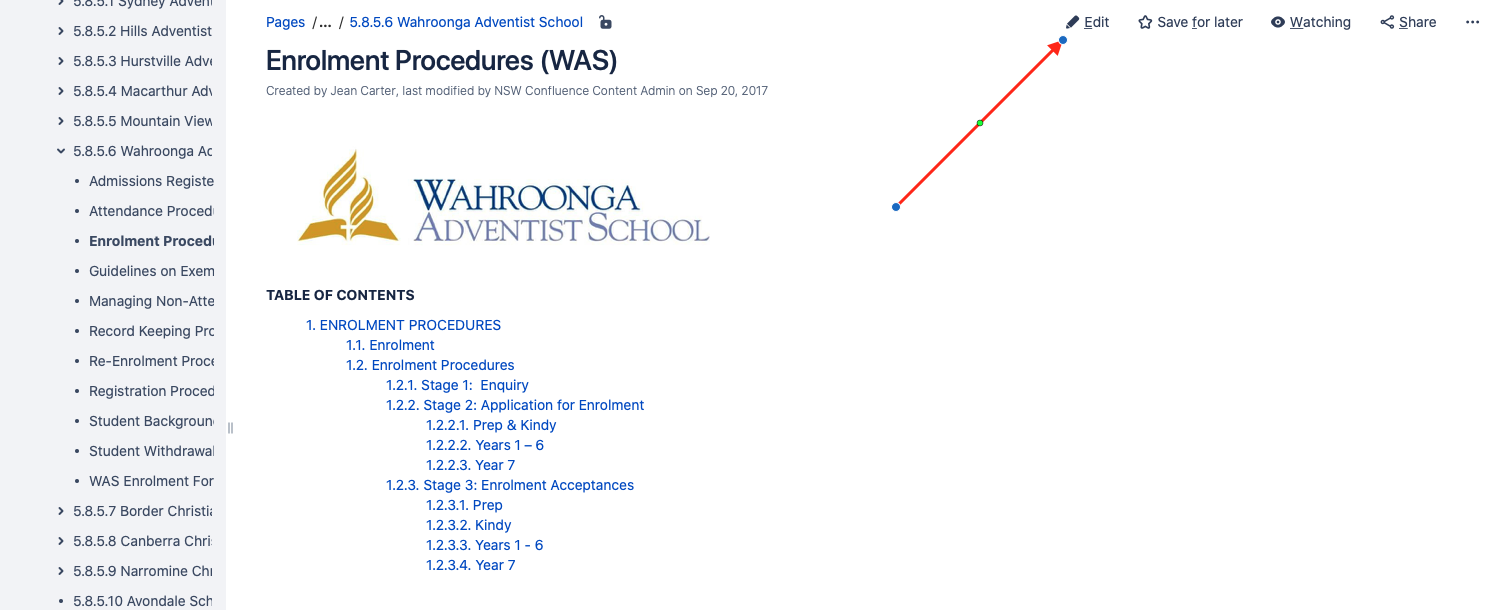
1.
Locate the page you wish to edit and click the edit button in the top right
2.
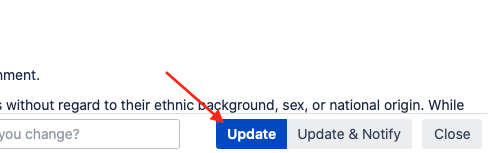
Once you have made your changes click on the 3 dots and click Preview.
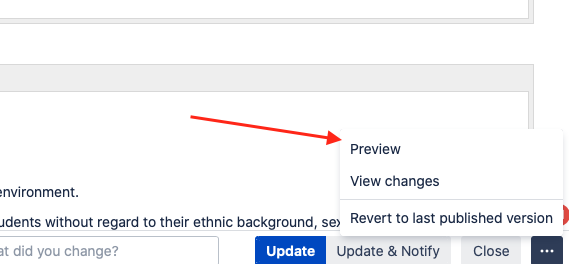
This allows you see to the changes you have made to the page page before clicking update, as every time you click publish it adds a new addition to the change history.
When you are happy with your changes click the update button.